
![]()
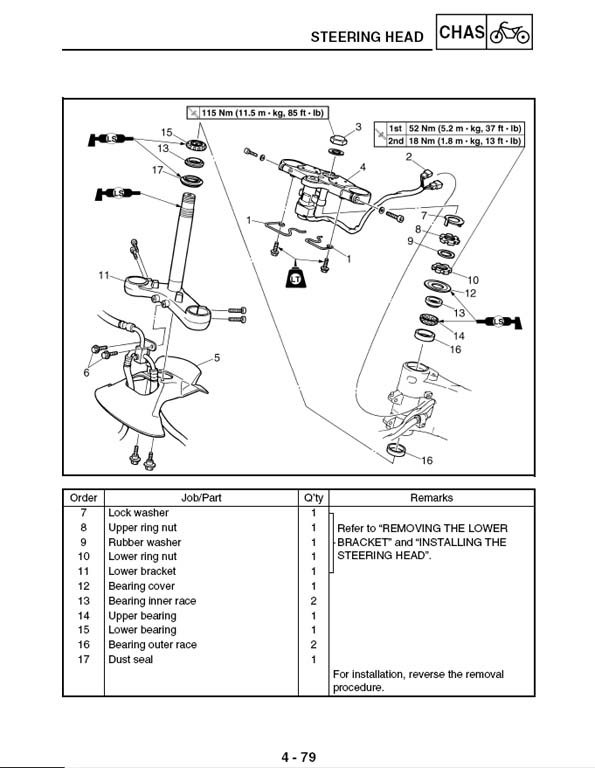
| Steering Head Bearing Service The Yamaha factory service manual calls for servicing the steering head bearings every 12,000 miles or 18 months. At 23,000 miles and 22 months, this second service was a little early. Jim Fortner hosted this wrenching session at his house in Plano. When I arrived, he was putting his bike back together after R&R his steering head bearings. I had the torque wrench and spanner.
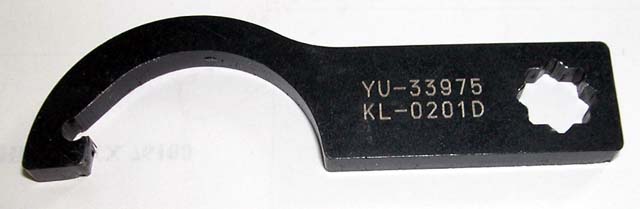
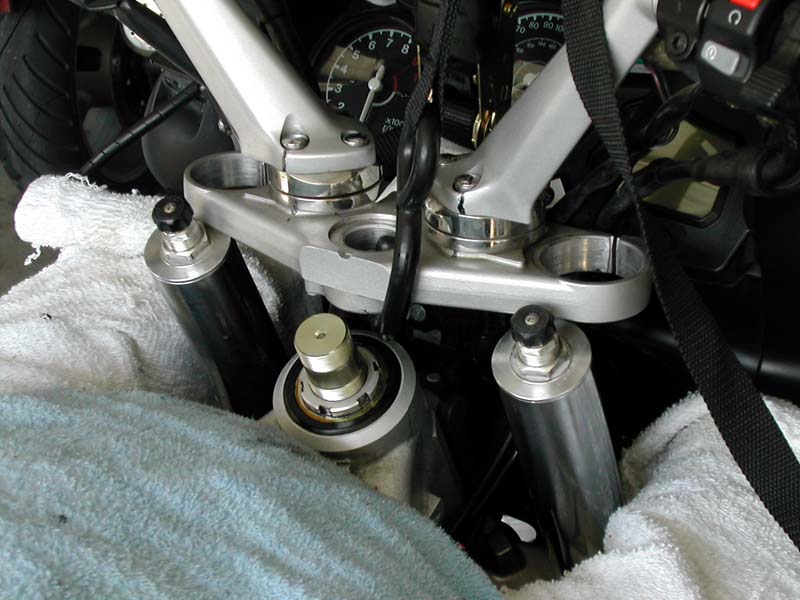
Yamaha sources their spanner from K&L. Both part numbers are clearly shown in the photo. Once we buttoned up his bike with those critical tools and rolled it away from the pipe stand, we rolled mine into position and attached it to the "sky hook".
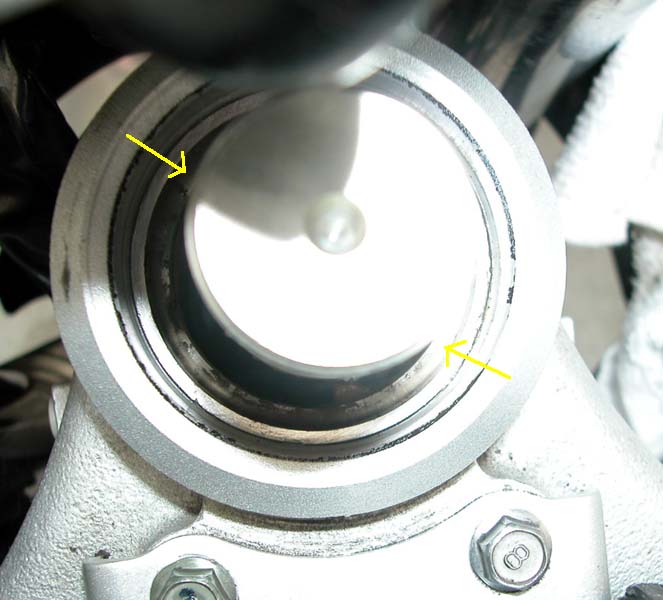
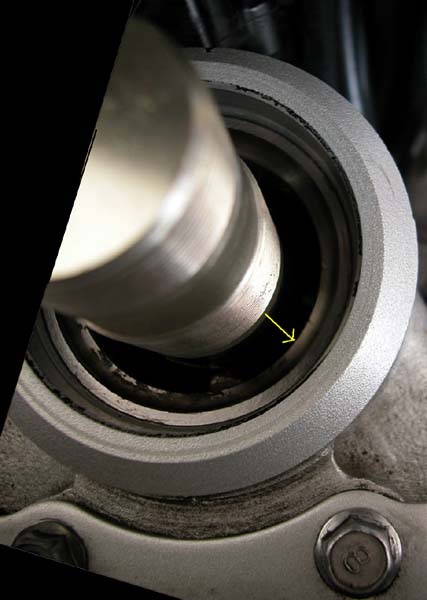
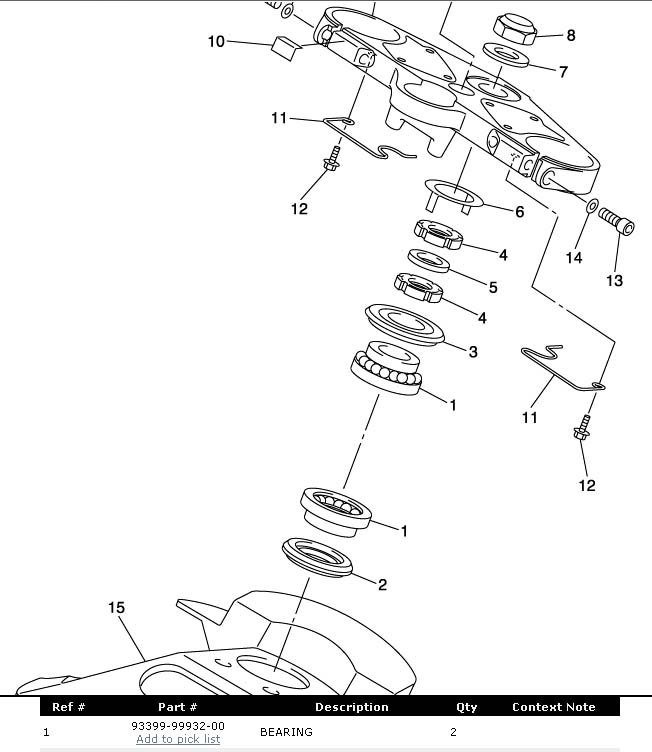
Everything went by the book for both bikes. According to pages 3-59 through 3-61 of the 2003 Factory Service manual. Since this is just a service, the inner races were not removed. If, during inspection, parts of the lower assembly or the outer race of the upper assembly needs replacement, you'll need to drop the fork assembly (along with the associated tasks of dealing with the brake lines, removing the old races, installing the new races, etc.). However, access to the upper bearing components for replacment is possible without further disassembly. It took about an hour and a half from the time we pulled it in to the time we backed it out. Since this was it's first bearing service, we were glad to see that Jim's 2004 assembly showed signs of being well-packed from the factory. My 2003 had already been serviced at 12,000 miles. It was clear that the shop doing the first service didn't have the spanner and had used either a flat bladed screw driver or chisel to tighten the lower ring nut. During the inspections, all the components on Jim's bike looked like new while my 2003 (2,000 fewer miles but 1 year older) had an upper, outer race that showed signs of the plating wearing off. All the other components (bearings, seals, etc.) still looked great. Since the races I had ordered hadn't arrived we reassembled everything appropriately. I'll plan on a complete dissassembly and replacement at the next service since there was no indication of rust, denting, or other damage. If I had the parts or if I had the bike apart at home, I'd have replaced the outer race before reassembly even if it meant waiting for the part to arrive.
Jim and I went for a test ride afterward and we both agreed that we could tell that this was time well spent. The front end felt much tighter and the feedback from the road was improved. Some extra points of interest. 1. Even though the shop manual shows the bearing assemblies as 3 distinct parts, Yamaha sells them as a single assembly. Each bearing package (outer race, bearing, inner race) is sold as a single part. Part number: 93399-99932-00. Yamaha's telling you to replace both races and the bearing as a set. To replace both bearing sets (upper and lower) you'll need 2 each of that part number.
2. VTCornerCarver, on the FJR Forum, did some research and learned that All Balls Racing offers a replacement steering head bearing as a tapered bearing! This would be the replacement part of choice for those wanting a more robust bearing. Kevin, at All Balls Racing, said the kit # (22-1003) and price ($31.97) includes both the upper and lower tapered bearing seats and seals. The web site shows the kit only matching a 2003 FJR. Please check with All Balls Racing for other model years and current pricing. 3. Bike Johnny now sells the spanner and the front/rear axle hex adapter as a pair. Summary of Service Steps
All
material on this site (c) 1995 - Present, Mark Johnson. All rights reserved. |

