2008
Subaru WRX STi
Intercooler Logo
![]()
In the years prior to 2008, STi's came with the STi logo stenciled in red on the intercooler. For some reason, with the new body style, Subaru dropped this distinctive branding. I really liked the look that this gave the engine bay, so took matters into my own hands. What follows are the steps taken to get back that great look.
![]()
Above is the bland, stock look of the 2008 intercooler.
First, you need a decent copy of the STi logo from off the internet. If you print it at 180dpi it should size to12.2" x 4.6" to match the factory logo size (you'll need over sized paper).
UPDATE: Since doing my intercooler, Scott has come up with a very nice vinyl stencil that is the exact size of the OEM logo. I highly recommend you contact him for more information.
Next, assemble the items for your mod project.
![]()
My kit (above, clockwise) included a roll of low-stick masking tape, a can of red paint (I chose caliper paint for its durability), a straight edge and ruller, an Exacto knife (or other sharp knife), and some construction paper.
Print out the STi logo onto the construction paper using a laser printer. If the construction paper is too wide to feed through the printer, cut some of the width off using scissors.
Place some cardboard under the construction paper to protect the working surface, then carefully cut out the logo. Take extra care to keep the lines straight and the corners sharp. The more care you take in this step, the better the results.
Measure the width of the logo and then find its center and mark it. Center the logo, left to right on the intercooler. Adjust the position of the stencil so that it visually balances in the middle of the intercooler. I originally lined up the stencil with the middle of the intercooler and the middle of the stencil but it didn't look right. This may be due to the bulk of the logo being visually "bottom weighted". Once the stencil is lined up on the intercooler properly, carefully mask the construction paper down insuring that the stencil doesn't move. After the stencil in secure, lay down extra paper to protect the engine bay from over spray (see below)
![]()
More paper would have been used but this was all that was on hand.
When painting, use short bursts of paint to keep over spraying down. That last thing you want is for your new car to have hints of red all over the engine bay.
![]()
When painting, spray straight down onto the stencil to make sure your lines are crisp and sharp.
![]()
Once done, remove the extra protective paper carefully.
![]()
Then remove the stencil.
![]()
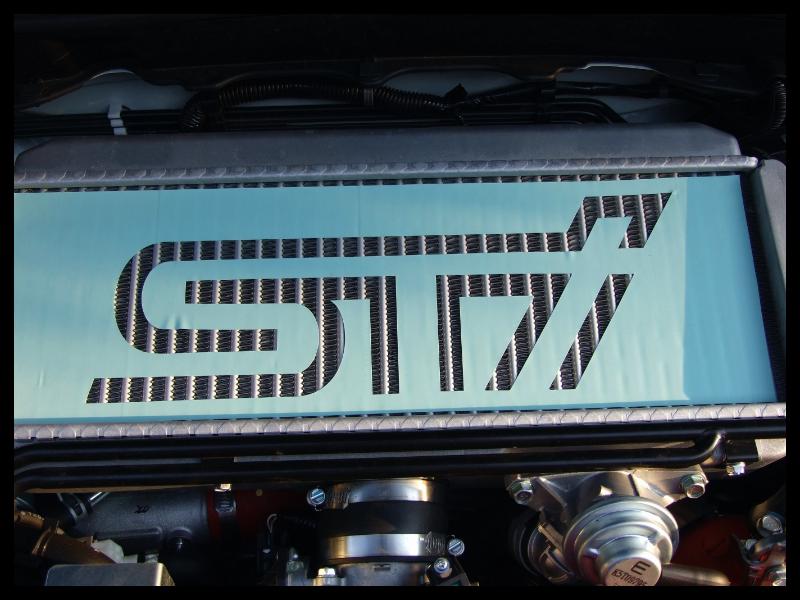
Step back and admire your handiwork! Since it was a raining, mess outside, I let it dry for 24 hours before taking the car out on the road.
![]()
Finally, the finished work peeks out through the hood scoop!
(C) 1995 - Present, Mark Johnson. All rights reserved.